
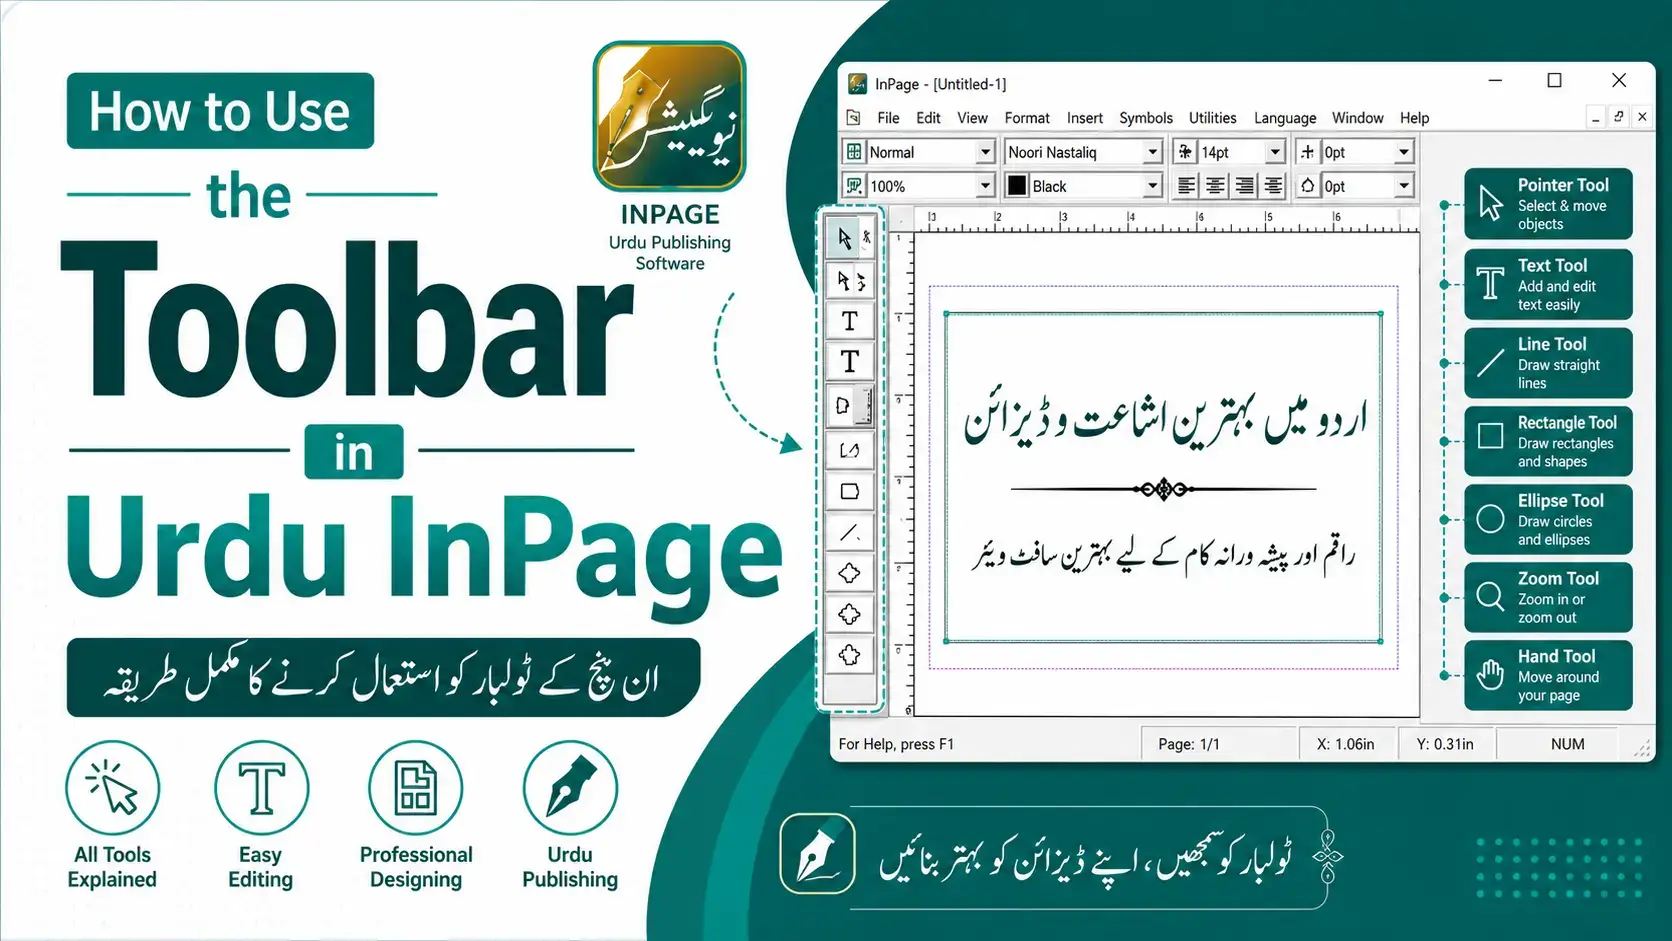
How to Use the Toolbar in Urdu InPage
Welcome back to the course. In this module we will explore the most important part of the screen for any designer: the toolbar in Urdu InPage. Once you understand these tools, designing a page becomes simple and even enjoyable.
I have spent years working inside this toolbar to lay out books, newspapers, and posters. When I train new designers, the very first thing I do is walk them through these tools one by one. Trust me, the moment these tools “click” in your mind, your speed and confidence will jump straight away.
Below, we will look at the toolbar, the working modes, and every key tool you need to know. Take your time, open InPage beside this guide, and try each tool with your own hands as you read.
1. Toolbar in Urdu InPage Overview
The toolbar in Urdu InPage is the strip of small buttons, usually placed along the side of your screen, that holds all your main design tools. Think of it as the toolbox you keep at home. Each button has one clear job, and you simply pick the right one for the task in front of you.
Here is what you should know about the toolbar before we go deeper:
- Each icon is a separate tool. You click a tool once to switch to it, and it stays active until you choose another one.
- Hovering over a tool usually shows its name. This is a quick way to learn the toolbar without memorising everything at once.
- The tools work on “boxes.” Almost everything in InPage lives inside a box, whether it is text, a heading, or a picture.
Get comfortable just looking at the toolbar first. Once the layout feels familiar, the rest of this module will make perfect sense.
2. Modes in Toolbar in Urdu InPage
Before touching the tools, you must understand the two main modes of InPage, because this single idea removes most of the confusion that beginners feel.
- Object (box) mode: This is when you select a box to move it, resize it, or arrange it on the page. You are handling the box from the outside, like moving a frame on a wall.
- Text (edit) mode: This is when you go inside a box to type, edit, or format the words and pictures it holds. You are now working on the content within the frame.
In simple words, one mode arranges your boxes, and the other fills them. You usually enter edit mode by double-clicking inside a box, and you return to object mode by selecting the Arrow Tool. Keeping these two modes clear in your head is the real secret to working quickly in InPage.
3. Arrow Tool
The Arrow Tool is the tool you will use the most, so make it your best friend. It is your basic selection and pointer tool, used to grab and handle any box on the page.
- Select a box. Click once on any text box, heading, or picture, and small handles appear around it.
- Move a box. Click and drag the selected box to a new spot on the page.
- Resize a box. Drag those handles in or out to make the box bigger or smaller.
Whenever you feel lost or stuck inside a box, simply click the Arrow Tool. It instantly brings you back to safe ground in object mode, ready to arrange your layout again.
4. Hand Tool
The Hand Tool does not change your design at all. Instead, it moves your view of the page, which is very useful when you are zoomed in and working on small details.
- Pick up the page. Select the Hand Tool and your cursor turns into a small hand.
- Drag to scroll. Click and drag to push the page around the screen, just like sliding a sheet of paper on a desk.
I rely on the Hand Tool constantly when I zoom in close to fix tiny Nastaliq spacing. It lets me glide across a large page smoothly, without fighting with the scroll bars on the edges.
5. Rotation Tool
The Rotation Tool lets you turn a box to any angle you like. This is perfect for slanted headings, tilted stamps, or creative designs that should not sit perfectly straight.
- Select your box first. Click the box you want to rotate using the Arrow Tool.
- Switch to the Rotation Tool. Then click and drag around the box to spin it to the angle you want.
A word of advice from experience: use rotation gently. A slight tilt can look stylish, but too much rotation on Urdu text can make it hard to read. For most documents, straight text is still the cleanest and safest choice.
6. Linked & De-linked Tool
This tool is a true lifesaver, and learning it early will save you hours. The Linking Tool joins two or more text boxes so that your writing flows automatically from one box into the next.
- Start the link. Select the Linking Tool, then click the first text box; its border will begin to blink.
- Complete the chain. Click the second text box, and an arrow appears to show that the two boxes are now linked.
- Watch the text flow. When the first box fills up, the extra text moves into the next box on its own.
De-linking simply breaks this connection when you no longer want the boxes joined. On my first book project, I had not learned linking yet, and I painfully cut and pasted text box by box. Once I discovered linked boxes, long articles and multi-page chapters became effortless.
7. Textbox
The Text Box Tool is the heart of InPage, because this is where all your normal writing lives. Every paragraph, sentence, or column of body text sits inside a text box that you create.
- Draw the box. Select the Text Box Tool, then click and drag on the page to create a box of any size.
- Start typing. Double-click inside it to enter edit mode and begin writing your Urdu text.
- Shape your layout. Make several text boxes for columns, sidebars, or separate sections on the same page.
Think of each text box as a container for your words. Once you can create and fill these boxes with confidence, you are already doing real page design.
8. Headingbox
The Heading Box Tool is made specially for titles and headings, the large, eye-catching text that sits at the top of articles and pages. It is built to display bold Nastaliq headings beautifully.
- Create the heading box. Select the Heading Box Tool and drag out a box where your title should go.
- Type your heading. Enter your title text, then adjust its size and font so it stands out.
- Stretch it neatly. Heading boxes can spread the text smoothly across the full width using kasheeda, giving that classic newspaper look.
In my newspaper work, the heading box was a daily hero. It is the difference between a flat page and a page that grabs the reader’s eye from the very first glance.
9. Picture Tool
The Picture Tool, often called the picture box, lets you add images such as photos, logos, and design elements into your document. The box first marks the space, and then your picture sits neatly inside it.
- Draw the picture box. Select the Picture Tool and drag a box where the image should appear.
- Import your image. Use the import option to bring a photo or logo into that box.
- Adjust the fit. Resize and position the picture inside the box until it looks just right.
Keeping pictures inside boxes is what makes InPage layouts so tidy. You can move the whole box around the page, and the image always travels neatly along with it.
10. Drawing Tool
Finally, the Drawing Tools let you add simple shapes such as lines, boxes, and circles. These small touches are perfect for borders, dividers, and frames that make a page look organised and professional.
- Pick a shape. Select a drawing tool, such as the line tool or the box tool.
- Draw on the page. Click and drag to create your line, rectangle, or circle wherever you need it.
I often use a simple line to separate two news items, or a clean box to frame an important notice. These plain shapes seem minor, but they bring real structure and polish to any layout.